利用Midjourney与Stable Diffusion实现线稿上色与3D化教程
6/4/2024, 3:26:09 PM | 热度:33 | 阅读本文需 4 分钟
点赞
描述: 本教程将向您展示如何利用Midjourney生成线稿,然后使用Stable Diffusion进行上色和3D化处理。通过简单的步骤,您将能够将简单的线稿转变为令人惊叹的3D艺术作品。
关键词: Midjourney, Stable Diffusion, 线稿上色, 3D化, 图文教程, 深度学习模型
本教程将向您展示如何利用Midjourney生成线稿,然后使用Stable Diffusion进行上色和3D化处理。通过简单的步骤,您将能够将简单的线稿转变为令人惊叹的3D艺术作品。
在数字艺术与设计中,线稿的上色和3D化是提升作品视觉效果的重要步骤。在本教程中,我们将利用Midjourney与Stable Diffusion这两个强大的深度学习模型,轻松实现线稿的上色与3D化处理。通过简单的步骤,您将能够将简单的线稿转变为令人惊叹的3D艺术作品。
灵感来源 B 站 UP 主设计师老克
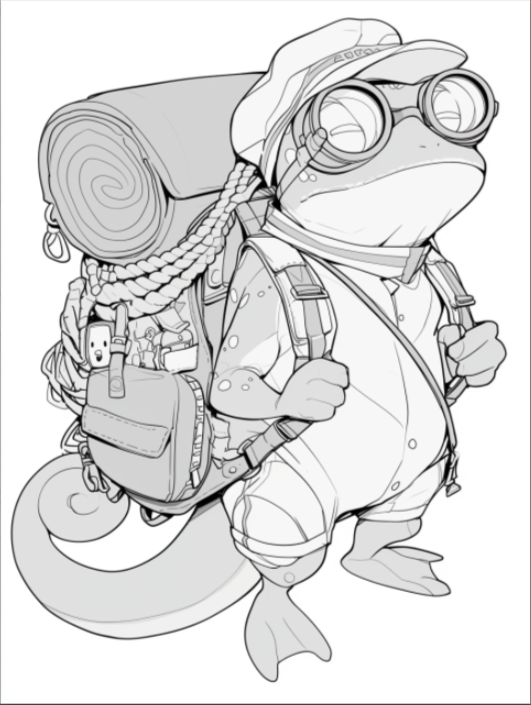
1.MJ 生成线稿
这边使用设计老克分享的关键词
Black and white line drawing illustration of a cool Chameleoncartoon lP character, black line sketch, wearing flight glasses onhis head, beret, carrying a huge hiking bag filled with all kindsof essential hiking gear and toys, matching rope and straps athis wrists, adventure element style, popular toys, blind box toys,Disney style, ((white background))
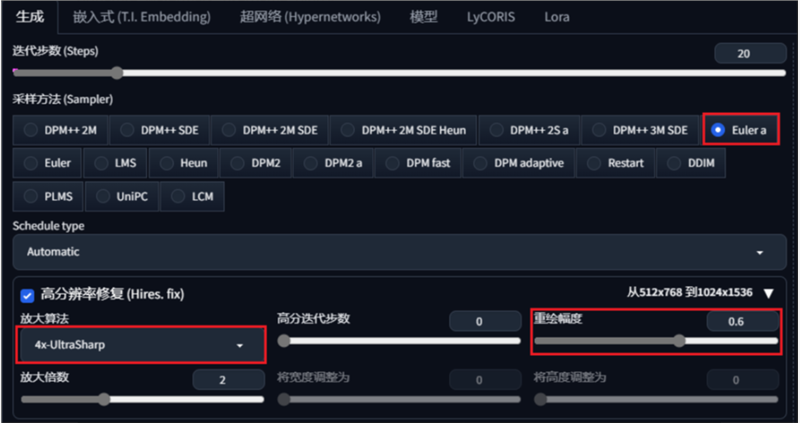
2.SD 参数设置
【大模型】ReVAnimated_v122
【提示词】((white background)) (8k, raw photo, best quality, masterpiece)(photon mapping, radiosity, physically-based rendering, automaticwhite balance),CG,unity,official art,amazing,finely detail,an extremelydelicate and beautiful,extremely detailed,3d rendering,c4d,blender,octanerender,disney style,wearing flight glasses onhis head,beret,carrying a huge hiking bag filled with all kindsof essential hiking gear and toys,matching rope and straps athis wrists,adventure element style,popular toys,blind box toys,Disney style,((white background)),
【负面提示词】monochrome,black and white, lowres, bad anatomy, bad hands, text, error, missing fingers, extra digit, fewer digits, cropped, worst quality, low quality, normal quality, jpeg artifacts, signature, watermark, username, blurry
【采样方法】DPM++ 3M SDE 或者 Euler a
【采样步数】20
【高清修复】算法: 4x-UltraSharp 重绘幅度:0.6
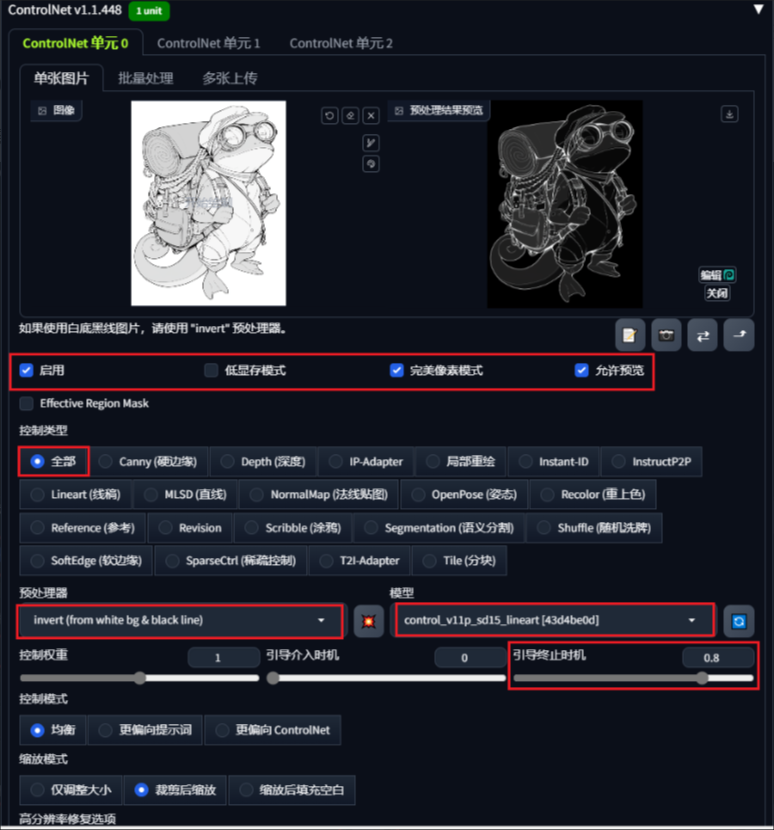
3.ControlNet 设置
需要注意的是预处理器选择 invert,模型选择线稿模型
4.点击生成
这步可以多刷新几次,如果颜色都不满意,可以在提示词里指定颜色,比如绿色帽子,红色衣服
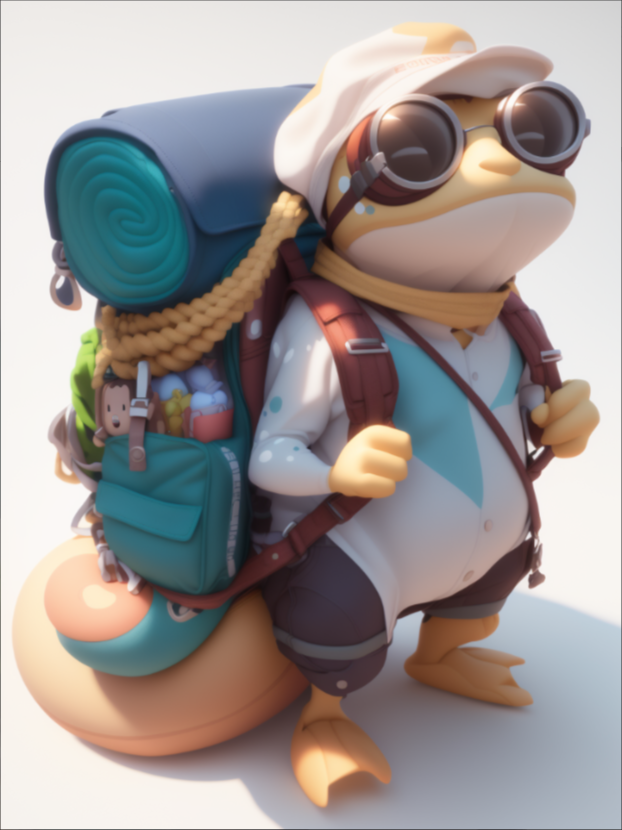
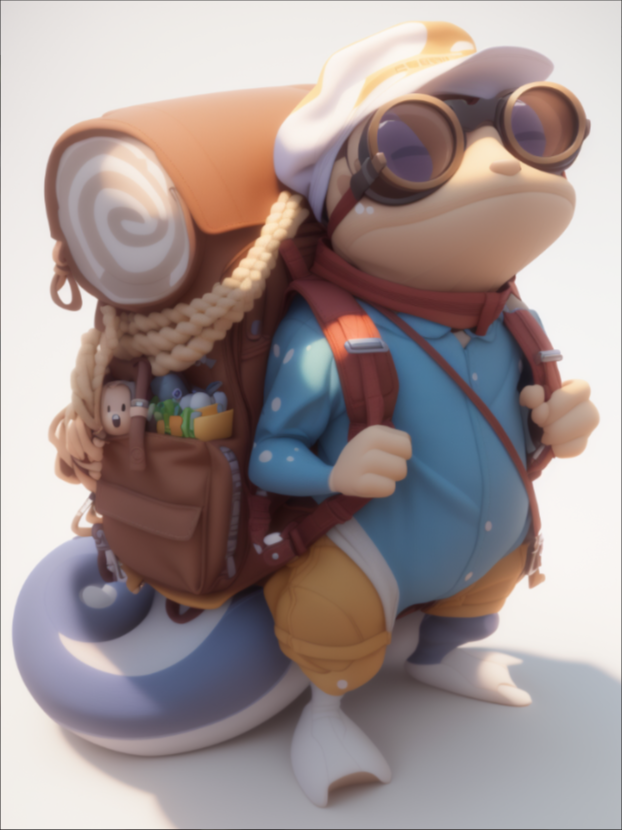
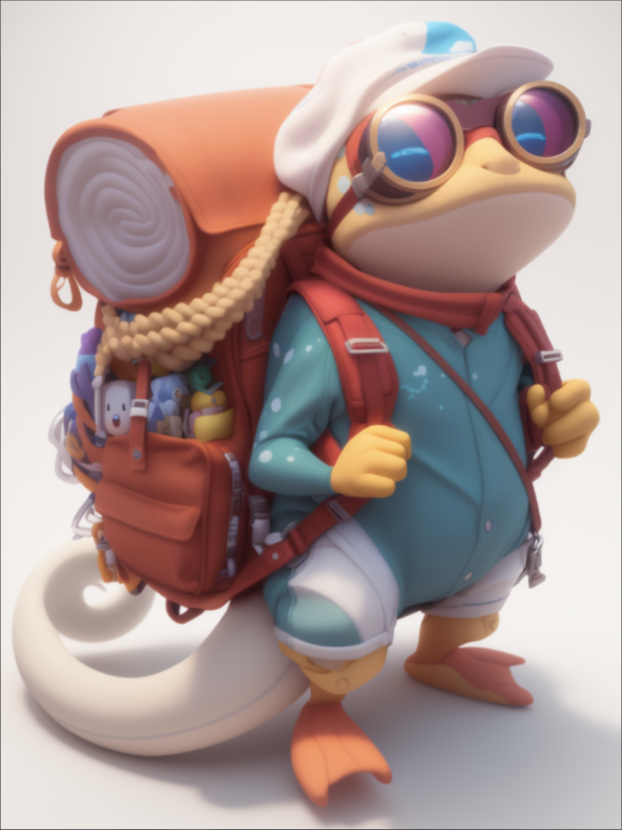
5.图生图 3D 化
如果觉得提示词中的 3D 不够明显,我们可以再发送到图生图中继续调整
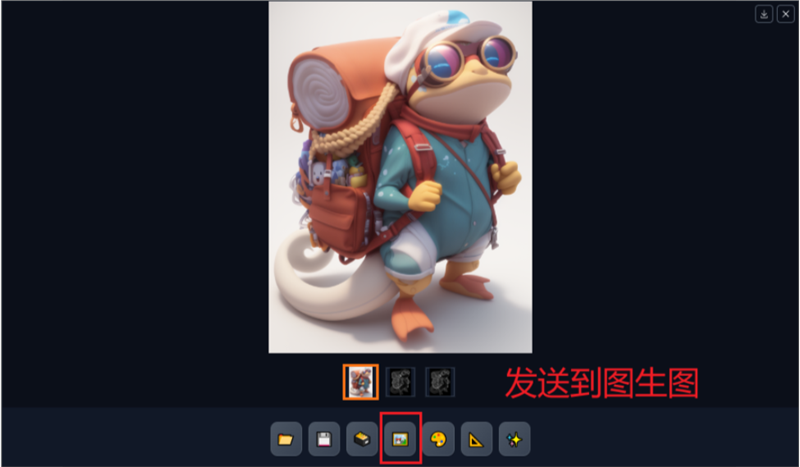

Lora 在哩布哩布上可以下载
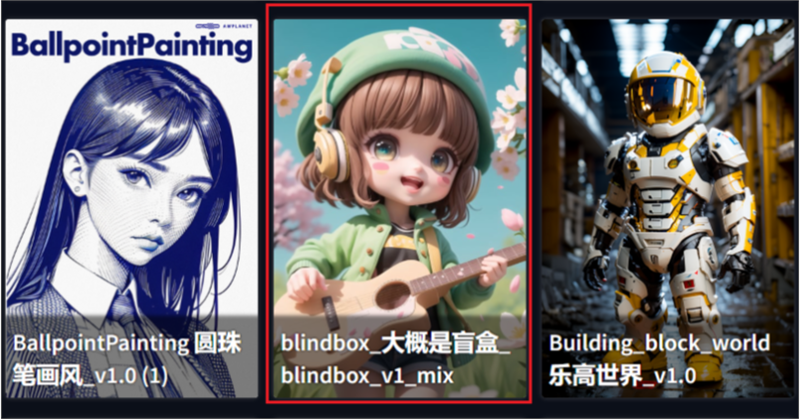
重绘幅度调整低一些

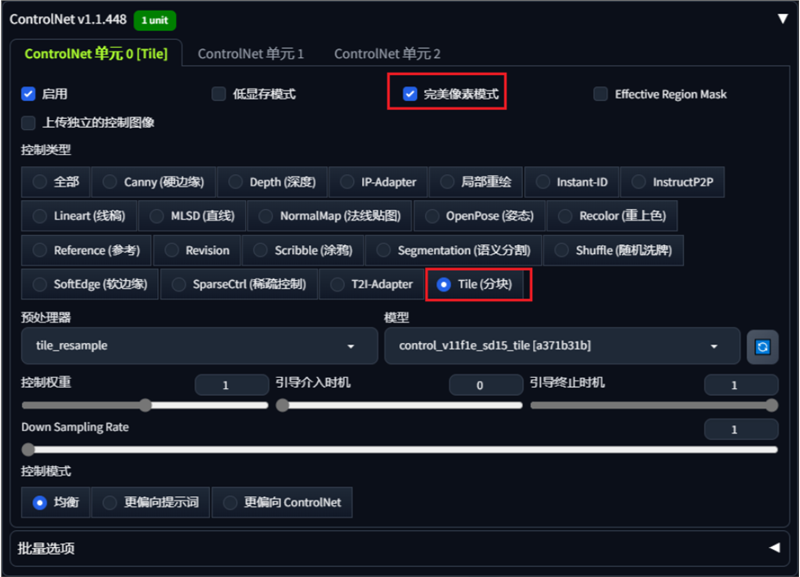
CN 开启 tile 分块
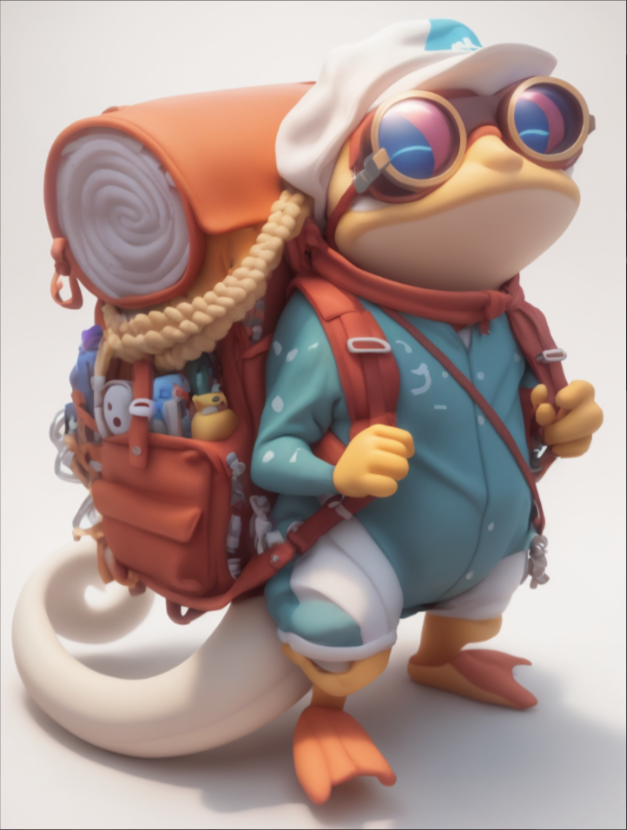
点击生成即可,可以对比上图 3D 效果会更明显一些
0
文章目录
1.MJ 生成线稿
2.SD 参数设置
3.ControlNet 设置
4.点击生成
5.图生图 3D 化
AI教程交流群

扫描二维码加入群聊
与同行学习交流&资源共通
© CopyRight 2002-2024 ,CHINAZ.COM , Inc.All Rights Reserved.